Eel Sauce Recipe for Homemade Sushi
Eel sauce is a flavorful addition that can make simple meals more enjoyable. This homemade eel sauce recipe uses only 3 simple ingredients to create a sweet, savory, sticky, and umami-packed sauce.
Despite its name, this sauce does not contain actual eel. It is commonly served with sushi and works well as a sushi sauce for drizzling over rice bowls, sushi bowls, and other dishes.
Eel Sauce Recipe-The Short Answer
This versatile sauce takes about 20–25 minutes of cooking, plus cooling time, and adds rich flavor without complicated cooking.
A small drizzle over roasted vegetables or other favorite dishes can elevate everyday meals.
The combination of sweet, savory, and sticky flavors creates the balanced umami taste that makes this sauce useful beyond sushi.
This recipe can also be made as a plant-based sauce because it uses only plant-based ingredients.
The simple combination of soy sauce, mirin, and sugar creates a glossy finish and concentrated flavor that works well for many different meals.
Why You’ll Love This Homemade Sauce
What makes Japanese eel sauce so useful is its versatility.
It is a popular condiment served with sushi and hibachi meals, but it can be used with many other dishes as well.
It works well over grilled steak, chicken, fish, pizzas, burgers, hoagies, and nachos. For something different, try it with hard aged cheese on a charcuterie board.
You can also stir it into noodles or use it with proteins and vegetables before roasting. A small amount adds a salty, sweet, and savory flavor to your favorite foods.
This sauce is also easy to make at home and is an inexpensive alternative to buying it from the grocery store.
The recipe uses only 3 simple ingredients: mirin, soy sauce, and sugar.
Stir the ingredients together first so the sugar begins to dissolve, then bring the mixture to a gentle simmer.
Reducing the sauce for about 15–20 minutes creates a smooth batch with a glossy texture without requiring complicated steps.
Making a batch ahead of time also makes it convenient for future meals.
As the sauce cools, it becomes noticeably thicker, so it should be removed from the heat while it is still slightly thinner than the final texture you want.
This helps create a glossy sauce that remains pourable instead of becoming too thick.
About This Recipe
This homemade eel sauce is a simple version of the unagi sauce commonly used in Japanese cuisine. Despite its name, it does not contain blended eel or actual eel.
It is traditionally known as unagi no tare and has a thick, sweet, salty, and sticky texture with a savory umami flavor.
This sauce is useful for adding the familiar flavor associated with grilled eel without requiring a complicated preparation. The recipe uses a simple combination of soy sauce, mirin, and sugar.
Mirin is a sweet rice wine that helps create the sauce’s balanced flavor and glossy texture. The finished sauce can be brushed over grilled eel during cooking or drizzled over sushi, rice bowls, and other dishes.
Unagi and anago, which are both types of eel, are commonly served with this style of sauce.
Some restaurant versions may use fish stock for extra flavor, while store-bought versions can vary in their ingredients.
This homemade version keeps the ingredient list simple and plant-based.
Difference Between Eel Sauce and Teriyaki Sauce
The easiest way to understand the flavor of eel sauce is to compare it with teriyaki sauce. The basic version of eel sauce uses soy sauce, mirin, and sugar.
The result is a thick, sticky, and glossy sauce with a sweet and savory flavor. Mirin is a sweet Japanese rice wine that gives the sauce its characteristic depth.
Teriyaki sauce usually follows a different flavor profile. Traditional Japanese teriyaki is also made with soy sauce, mirin, and sugar (often with sake), but many Western versions add aromatics such as ginger and garlic.
These ingredients can make teriyaki sauce more aromatic, while eel sauce focuses more on its rich sweet glaze and smooth texture.
Ingredients Needed
• 120 ml soy sauce
• 120 ml mirin
• 50 grams granulated sugar
Ingredients Notes
Soy sauce creates the savory foundation of the sauce.
Use regular Japanese-style soy sauce for this recipe rather than low-sodium soy sauce. It provides the salty and umami flavor that balances the sweetness from the sugar and mirin.
Mirin adds sweetness, depth, and the liquid needed for reduction. It helps create the traditional flavor profile and contributes to the glossy texture of the finished sauce.
Use regular store-bought mirin, either hon-mirin or aji-mirin.
Granulated sugar provides additional sweetness and helps develop the sticky, glossy finish as the sauce cooks.
The combination of sugar, soy sauce, and mirin creates the intended sweet-savory balance.
The recipe follows a 2:2:1 ratio:
• 120 ml soy sauce
• 120 ml mirin
• 50 grams sugar
Keeping these proportions consistent helps maintain the intended flavor and texture.
Rice vinegar should not be considered an equal replacement for mirin.
It has a sharper tang and does not provide the same flavor as mirin, and this recipe has only been developed with mirin.
For the actual recipe, mirin remains the specified ingredient.
How to Make Eel Sauce
Making this eel sauce recipe at home is quick and easy because it uses only three ingredients: mirin, soy sauce, and sugar.
For the standard batch, use:
• 120 ml soy sauce
• 120 ml mirin
• 50 g sugar
This follows the locked 2:2:1 ratio and keeps the ingredient proportions consistent.
Add all ingredients to a small saucepan or small sauce pot, about 16–18 cm (6–7 inches) in diameter. Stir the mixture well before heating so the sugar begins to dissolve and the ingredients combine evenly.
Place the pan over medium heat and stir for about 1–2 minutes, until the sugar has fully dissolved and no sugar crystals remain at the bottom. Once the mixture reaches a gentle simmer, reduce the heat to medium-low.
The goal is to reduce the sauce gradually rather than boil it aggressively. A gentle simmer helps prevent the sugar from burning on the bottom of the pan.
Cook the sauce for 15–20 minutes, stirring gently every 2–3 minutes. During the last 3–5 minutes, stir every 30–60 seconds and scrape the bottom of the pan, because the thickening sauce scorches more easily at this stage. During this time, the sugars reduce and the liquid concentrates.
Small bubbles may appear. If the sauce becomes burnt or overly caramelized, the temperature is too high.
The sauce is ready when it has reduced by approximately one-third, to about 180 ml, and reaches a glossy, thick consistency. It should be noticeably thicker than the original liquid but still pourable while warm. A silicone spatula or wooden spoon works well for stirring and scraping the bottom of the pan.
The mixture starts at about 270 ml once the sugar has dissolved. To check the volume, take the pan off the heat and carefully pour the sauce into a heatproof glass measuring cup. Let the foam settle for about a minute, then read the volume. If it is still well above 180 ml and very thin, pour it back into the pan and simmer for 1–2 minutes at a time.
Check the texture before removing the sauce from the heat by dipping a clean spoon into the hot sauce. It should coat the back of the spoon, look glossy, and flow slowly without behaving like a thick syrup. Remember that it will continue to thicken as it cools. The hot sauce should be slightly thinner than the final texture you want.
After cooling, it develops a smooth, slightly sticky, honey-like consistency that works well for sushi rolls and other serving uses.
Allow the sauce to cool completely before transferring it to an airtight container. Place it in the refrigerator after cooling. The sauce becomes thicker as it cools, so avoid judging the final texture while it is still hot.
After removing the saucepan from the heat, let the sauce cool for about 10–15 minutes. During this time it becomes noticeably thicker, so do not add extra water just because the freshly cooked sauce looks thinner than expected. This keeps the preparation simple while helping maintain the intended texture and consistency.
Serving Suggestions
A simple way to serve eel sauce is by drizzling it over sushi, spring rolls, or vegetable sushi rolls.
A squeeze bottle makes it easy to create decorative drizzles, while a small ramekin works well for dipping or serving the sauce on the side.
This sauce pairs naturally with dishes such as Okonomiyaki, Hibachi Fried Rice, and Onigiri.
It also works well with Japanese cabbage pancakes, Japanese rice balls, and poke dishes such as Hawaiian Ahi Poke Bowls and Tako Poke.
The sauce is also useful with stir-fry and noodle dishes where a small amount can boost the overall flavor.
Try it with meat, vegetables, or as a finishing glaze for dishes such as Tuna Tartare, Salmon Tartare, and Wasabi Deviled Eggs with Tuna.
You can also serve it with burgers, sliders, sandwiches, tacos, pizza, Ahi Loaded Nachos, poke nachos, and traditional cheese nachos.
A good starting point is about 1–2 tablespoons, depending on the dish and desired intensity. Since the sauce has a concentrated flavor, start with a small amount and add more as needed.
Grilled eel and unagi are traditional pairings, but there are many other ways to use this sauce at home.
It works with sushi bakes, sushi rolls, salmon rice bowls, chicken, salmon, salads, tofu, roasted vegetables, and vegetable-based dishes.
For a different texture and flavor, brush the sauce over grilled eggplant, zucchini, and mushrooms.
It can also be tossed with stir-fried udon or soba noodles, bok choy, snap peas, and scallions for a quick flavorful meal.
Storage Life
Allow the eel sauce to cool completely before storing.
Transfer it to a sealed container, such as a heatproof glass jar, and keep it refrigerated until needed.
Using a clean utensil each time helps maintain good storage practices. This sauce is concentrated, so making smaller batches can be practical.
A small amount can add plenty of flavor, which makes it easier to use what you need while keeping the sauce fresh.
Storage guidance can vary from about one week to a few weeks and up to one month.
Since storage timeframes are not consistent, it is better not to treat any single duration as a universal limit.
If the chilled sauce becomes very thick, let it sit at room temperature for about 10 minutes before using.
The sauce naturally thickens as it cools, so allowing it to soften slightly can make it easier to drizzle.
What to Do With Leftover Eel Sauce
If you have leftover eel sauce, allow it to cool completely before transferring it to an airtight container.
Keep it refrigerated and use a clean utensil each time.
Storage times vary, so a conservative approach works best: keep the sauce refrigerated and use a clean utensil each time.
There are several easy ways to reuse leftover sauce.
Gently warm it and use it as a glaze for roasted or grilled vegetables. It can also be served as a dip with dumplings and spring rolls.
A small amount works well with fried rice and noodle dishes because the concentrated flavor can add depth without making the dish overly saucy.
You can also stir a spoonful into soups, marinades, or dressings when you want to boost the flavor of a meal.
The rich umami taste works especially well when you only need a small amount to add extra depth.
Tips for Making Eel Sauce
Keep the heat at medium to medium-low when making eel sauce.
Using high heat can cause the sugar to caramelize too quickly or turn into candy.
A gentle simmer allows the sugar to dissolve properly while the sauce reduces gradually.
As the sauce reaches a simmer, some bubbling and foam may appear.
This foamy surface is normal while the sauce cooks and does not mean something has gone wrong.
Be patient during the simmering process and avoid judging the final thickness while the sauce is still hot.
Stir gently during cooking and allow the sauce to cool before checking the final texture.
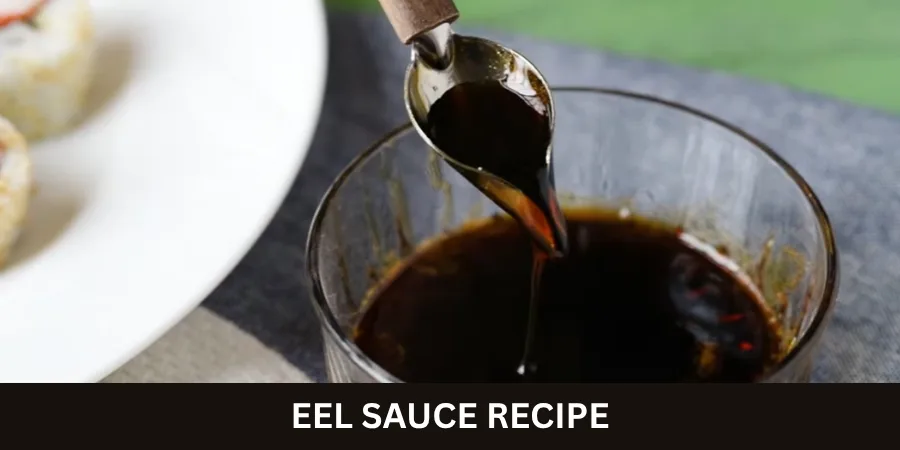
The finished sauce should be smooth, glossy, dark brown, and slightly thicker with a honey-like consistency.
Since the sauce becomes thicker as it rests, remove it from the heat while it is still slightly thinner than the final texture you want.
Notes
Allow the sauce to cool completely before transferring it to a clean airtight container.
Refrigerate it after cooling to help maintain its texture and flavor.
Storage times can vary, so avoid treating one month as a fixed universal limit.
Making smaller batches and using a clean utensil each time is a practical approach for maintaining quality.
Nutrition Information
A 1 tablespoon (15 ml) serving of the finished eel sauce contains approximately:
36 kcal
7.1 g carbohydrates
0.7 g protein
0.1 g total fat
0.0 g saturated fat
0.1 g fiber
6.2 g sugar
610 mg sodium
0 mg cholesterol
The recipe makes about 180 ml of sauce, which provides approximately 12 servings with a serving size of 1 tablespoon.
These nutrition values are calculated estimates rather than laboratory-tested results.
The final values may vary slightly depending on the nutrition labels of the soy sauce and mirin used.
Frequently Asked Questions
Is Eel Sauce Just Teriyaki Sauce?
Eel sauce and teriyaki sauce are different, although both are soy-based sauces.
This eel sauce recipe combines soy sauce, mirin, and sugar to create a balanced sweet, salty, and savory flavor.
Its glossy texture makes it especially useful with sushi and other dishes where a concentrated sauce works well.
Teriyaki sauce usually follows a different flavor profile and may include additional ingredients such as ginger and garlic.
Eel sauce focuses more on its rich sweet glaze and smooth sticky texture.
Is Eel Sauce Made With Eels?
Despite its name, eel sauce does not contain eels or actual eel. The sauce ingredients used in this recipe are soy sauce, mirin, and sugar. These plant-based ingredients create the rich umami flavor associated with this style of sauce.
Is Eel Sauce Vegan?
Yes, this recipe uses only plant-based ingredients. Strict vegans should check the labels of the sugar and mirin they use. Because the ingredients are plant-based, it can be served with suitable dishes such as sushi, vegetables, rice bowls, and noodles.
How Long Does Homemade Eel Sauce Last?
Homemade eel sauce should be stored in the refrigerator after cooking. Allow the sauce to cool completely before transferring it to a clean airtight container.
Storage times vary from about one week to a few weeks and up to one month, so no single duration is guaranteed. Keep the sauce refrigerated, use a clean utensil each time, and make smaller batches to keep it fresh.